
You may be developing an app that follows the material design specifications. To make any widget appear prominent, you may need to elevate it. Elevating a Container widget in Flutter creates a drop shadow effect (below the container). There lot of ways you can elevate a container like using Card, PhysicalModel. But in this tutorial, we’ll see the simplest ways to add elevation on the Container widget in Flutter using the Material and DecoratedBox widget.
Here’s what we’ll cover in this tutorial:
- The Problem
- Steps to Add Elevation on the Container Widget in Flutter
- Adding Top Elevation to Container Widget
- Customizing Drop Shadow
The Problem
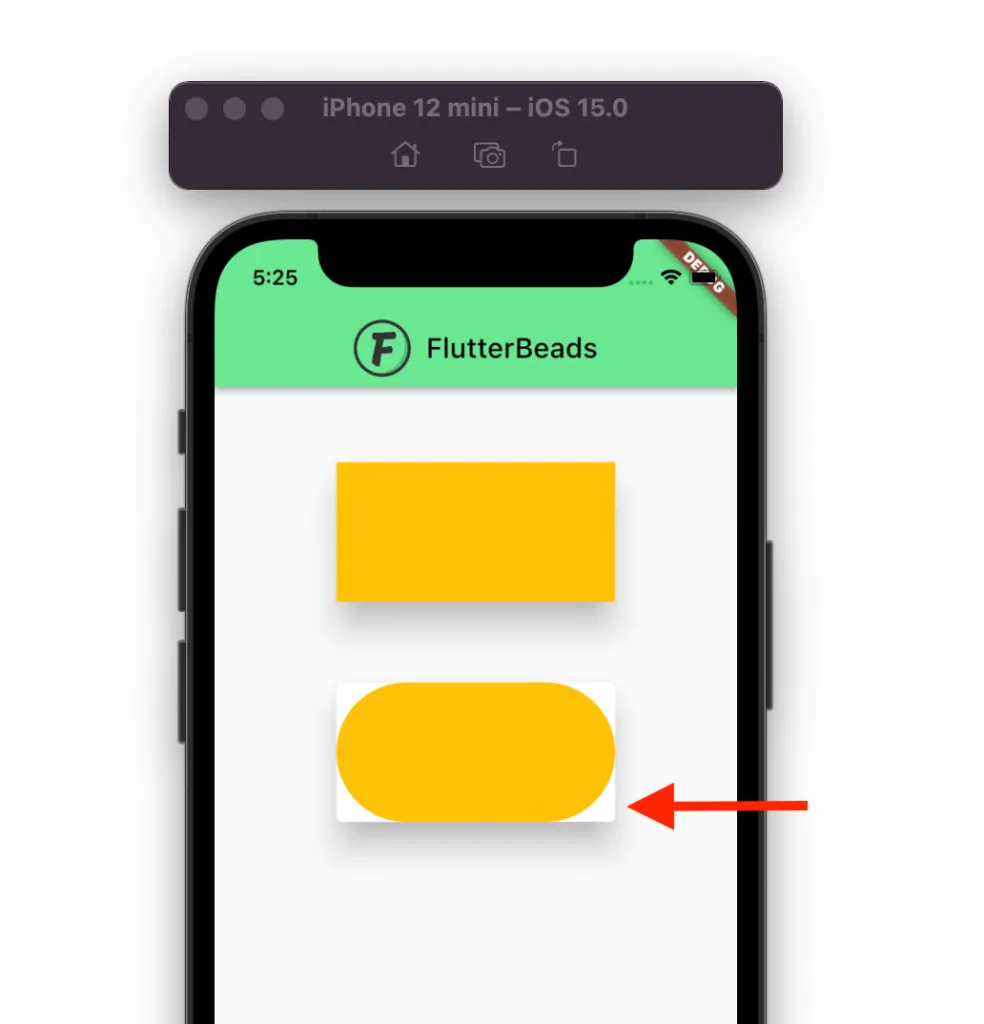
We all love Container widget because of its ability to customize the UI. However, it doesn’t support the elevation property as of now. One can easily wrap the container widget inside the Card widget (which supports elevation property) if the container is rectangular in shape. But if you have a container with rounded border at all corners, you might see a problem.
Code Example:
Column(
  //mainAxisAlignment: MainAxisAlignment.center,
  children: [
    SizedBox(
      height: 50,
    ),
    //
    Card(
      elevation: 20,
      child: Container(
        height: 100,
        width: 200,
        decoration: BoxDecoration(
          color: Colors.amber,
        ),
      ),
    ),
    SizedBox(
      height: 50,
    ),
    Card(
      elevation: 20,
      child: Container(
        height: 100,
        width: 200,
        decoration: BoxDecoration(
          color: Colors.amber,
          borderRadius: BorderRadius.all(Radius.circular(50)),
        ),
      ),
    ),
  ],
)
Output:
Steps to Add Elevation on the Container Widget in Flutter
The elevation on the Container widget in Flutter is added by wrapping it inside of the Material widget. And then setting the elevation property will just do the work. If the Container widget has the borderRadius property assigned, you should simply copy the same borderRadius property and paste it inside the Material widget.
Here’s are the steps:
Step 1: Add the Container widget which you would like to elevate.
Step 2: Wrap the Container widget inside of the Material widget.
Step 3: Add the elevation parameter (inside Material) and assign the appropriate value.
Step 4: (Optional) If you have added the borderRadius property to the Container, also add the borderRadius property to the Material widget.
Step 5: Run the app.
Code Example:
Material(
  elevation: 10,
  borderRadius: BorderRadius.all(Radius.circular(50)),
  child: Container(
    height: 100,
    width: 200,
    decoration: BoxDecoration(
      color: Colors.amber,
      borderRadius: BorderRadius.all(Radius.circular(50)),
    ),
  ),
)
Output:

Looking to add some style to your Flutter containers? Check out our post on “Add Border to Container in Flutter” to learn how to create beautiful borders that complement your design.
Adding Top Elevation to Container Widget
By default, when you elevate a container widget using the Material widget, the drop shadow effect is created below the Container. What if you wanted to have the shadow above the container widget i.e top elevation to the container?
To do that, you can’t use the Material widget to add top elevation to the container. Instead, we’ll use the BoxDecoration widget for adding top elevation.
Let’s see how to add top elevation to the Container widget:
- Add the Container widget.
- Add the decoration parameter (inside Container) and assign the BoxDecoration class.
- Add the boxShadow parameter (inside BoxDecoration) and assign the BoxShadow class.
- Add the offset parameter (inside BoxShadow) and set the value to Offset(0,-10,).
- Step 5: Run the App.
Code Example:
Container(
  width: 200,
  height: 100,
  decoration: const BoxDecoration(
    borderRadius: BorderRadius.all(Radius.circular(50)),
    boxShadow: [
      BoxShadow(
          color: Colors.grey, //New
          blurRadius: 25.0,
          offset: Offset(0, -10))
    ],
  ),
  child: Container(
    decoration: const BoxDecoration(
        borderRadius: BorderRadius.all(Radius.circular(50)),
        color: Colors.red),
  ),
)
Output:

Customizing Drop Shadow
If you need to customize the drop shadow such as changing the size and color of the shadow, kindly check this tutorial.
Code Example:
Container(
  width: 200,
  height: 100,
  decoration: const BoxDecoration(
    borderRadius: BorderRadius.all(Radius.circular(50)),
    boxShadow: [
      BoxShadow(
          color: Colors.amber, //New
          blurRadius: 25.0,
          offset: Offset(0, 25))
    ],
  ),
  child: Container(
    decoration: const BoxDecoration(
        borderRadius: BorderRadius.all(Radius.circular(50)),
        color: Colors.red),
  ),
)
Output:

That’s it. Thanks!
Conclusion
In this tutorial, we learned how to add elevation on the Container widget in Flutter using the Material widget. We also learned how to add top elevation to the container and change the size and color of the drop shadow using the BoxDecoration widget.
Would you like to check other interesting Flutter tutorials?