
The Dialog widget in Flutter popup on the screen to get confirmation regarding the critical/irreversible task or let users know about the crucial information about the app. The dialog widget quickly draws the user’s attention by appearing in the center of the screen. When it appears it may or may not allow users to interact with other UI elements of your app and can be dismissed by clicking outside of a dialog. So in this tutorial, we’ll see how you can use Showdialog Flutter method to show popup or confirm dialog called Alertdialog.
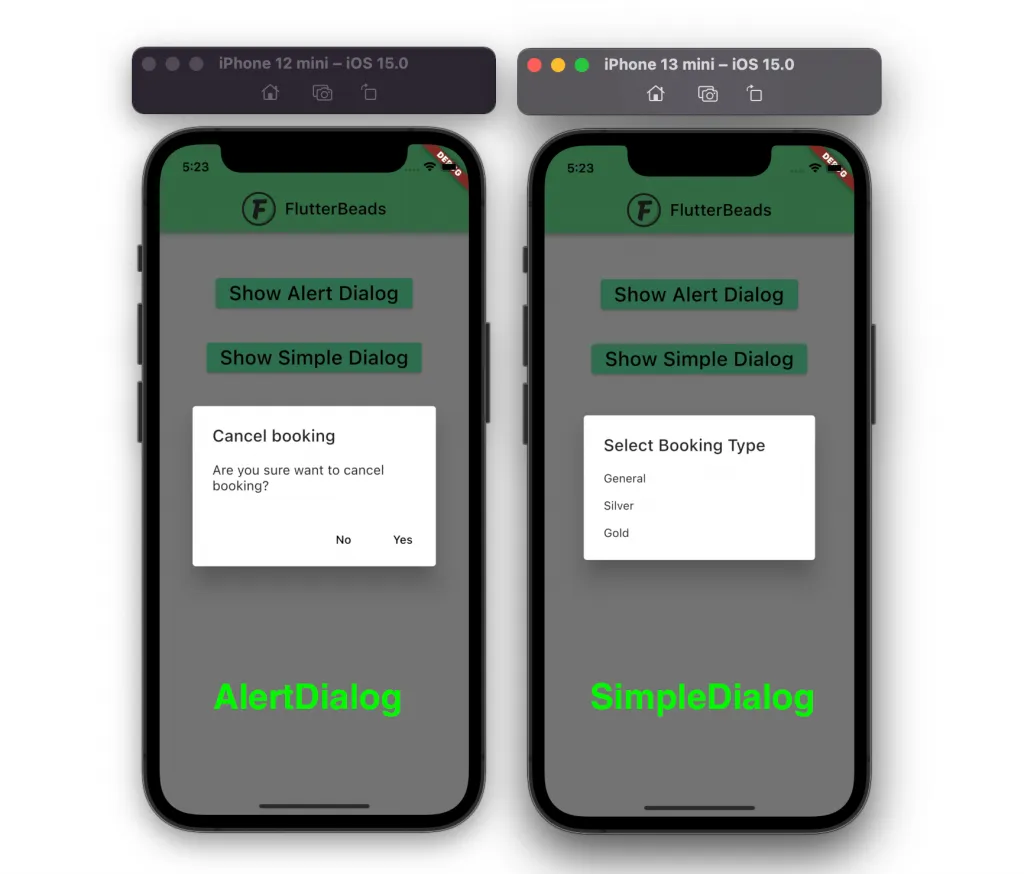
Here’s how it looks:
Here’s what we’ll cover:
- Types of Flutter Dialog
- Using showdialog Flutter method to show Alertdialog
- Showing SimpleDialog in Flutter
Types of Flutter Dialog
While developing your app, you can use the following two types of Flutter Dialog:
- AlertDialog
- SimpleDialog
Let’s see how you can add each type of dialog in your Flutter app and also understand when to use which one.
Using showdialog Flutter method to show Alertdialog
The AlertDialog widget in Flutter is used to get confirmation from users for any critical action they have asked to perform. For example, you could show the Alerty dialog when a user wants to delete/discard any important data of their account.
If you are a visual learner you can learn about the AlertDialog here:
Here are the steps to use showdialog Flutter method to show Alertdialog:
- Make sure you have a
StatefulWidget. - Create a method and return the
showDialogwidget. - Inside the
builderof showDialog, return anAlertDialog. - Inside the AlertDialog, add the
contentparameter and return theListBody. - Inside the AlertDialog, add the
actionsparameter and return the twoTextButtonwidgets for positive and negative action. - Add a button (e.g.
ElevatedButton) widget to your page. - Inside the
onPressedof button widget, call a method to open the AlertDialog.
Code Example:
Future<void> _showAlertDialog() async {
  return showDialog<void>(
    context: context,
    barrierDismissible: false, // user must tap button!
    builder: (BuildContext context) {
      return AlertDialog( // <-- SEE HERE
        title: const Text('Cancel booking'),
        content: SingleChildScrollView(
          child: ListBody(
            children: const <Widget>[
              Text('Are you sure want to cancel booking?'),
            ],
          ),
        ),
        actions: <Widget>[
          TextButton(
            child: const Text('No'),
            onPressed: () {
              Navigator.of(context).pop();
            },
          ),
          TextButton(
            child: const Text('Yes'),
            onPressed: () {
              Navigator.of(context).pop();
            },
          ),
        ],
      );
    },
  );
}
// --- Button Widget --- //
ElevatedButton(
  onPressed: _showAlertDialog,
  child: const Text(
    'Show Alert Dialog',
    style: TextStyle(fontSize: 24),
  ),
),
Note: By default, the AlertDialog is dismissed only when you click on any action button. To allows users to dismiss the AlertDialog on clicking outside the dialog, set the barrierDismissible:true.
Output:

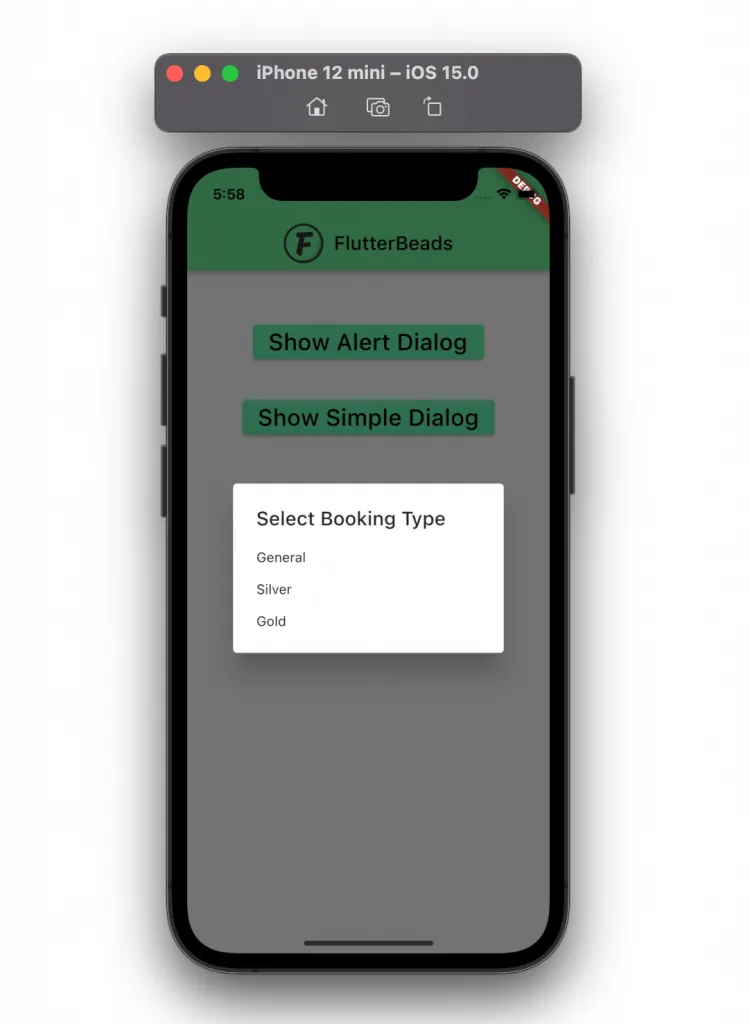
Showing SimpleDialog in Flutter
The SimpleDialog widget in Flutter is used to display a list of options that users can select. For example, You could show the SimpleDialog when a user wants to switch to another account.
Here are the steps to show SimpleDialog in your Flutter app:
- Make sure you have a
StatefulWidget. - Create a method and return the
showDialogwidget. - Inside the
builderof showDialog, return theSimpleDialog. - Inside the SimpleDialog, add the
childrenparameter and return the list ofSimpleDialogOptionwidgets. - Add a button (e.g.
ElevatedButton) widget to your page. - Inside the
onPressedof button widget, call a method to open the SimpleDialog.
Code Example:
Future<void> _showSimpleDialog() async {
  await showDialog<void>(
      context: context,
      builder: (BuildContext context) {
        return SimpleDialog( // <-- SEE HERE
          title: const Text('Select Booking Type'),
          children: <Widget>[
            SimpleDialogOption(
              onPressed: () {
                Navigator.of(context).pop();
              },
              child: const Text('General'),
            ),
            SimpleDialogOption(
              onPressed: () {
                Navigator.of(context).pop();
              },
              child: const Text('Silver'),
            ),
            SimpleDialogOption(
              onPressed: () {
                Navigator.of(context).pop();
              },
              child: const Text('Gold'),
            ),
          ],
        );
      });
}
// --- Button Widget --- //
ElevatedButton(
  onPressed: _showSimpleDialog,
  child: const Text(
    'Show Simple Dialog',
    style: TextStyle(fontSize: 24),
  ),
),
Output:
Conclusion
In this tutorial, we learned the 2 types of Flutter dialog that you can use to grab the user’s attention which include AlertDialog and SimpleDialog. We learned how you can use Showdialog Flutter method to show popup or confirm dialog called Alertdialog. We learned that the dialogs are important UI elements for any application to interrupt the user and get confirmation on a critical task.
FAQs
How to dismiss or close alert dialog in flutter?
To dismiss or close an AlertDialog in Flutter, you can call the Navigator.pop(context) method, where context is the context of the current widget.
Would you like to check other interesting Flutter tutorials?