
The TextField widget in Flutter is one of the most widely used and important widgets. It is used to accept the user input in varieties of scenarios. A common example is using it in a messaging app to allow users to send a message. But sometimes users may need to enter the long message and at the same time, they may also want to see the full message. This can be done by adding the multiline TextField. So in this tutorial, we’ll see the 3 ways to create multiline TextField in Flutter.
Here’s how it looks on Android, iOS, and the Web:

Here’s what we’ll cover:
The Problem
When you add the TextField widget in your app and start typing a long message, you’ll notice that the old text of the message (starting text) starts to shift towards to left side and keeps on shifting as long as you enter the long message that doesn’t fit on a single line. This may frustrate users and can provide a bad user experience to users.
Ways to Create Multiline TextField in Flutter
The multiline TextField in Flutter can be created using the combination of minLines, maxLines, and expands property. You can use any of these approaches based on your requirement.
Using maxLines and minLines Properties
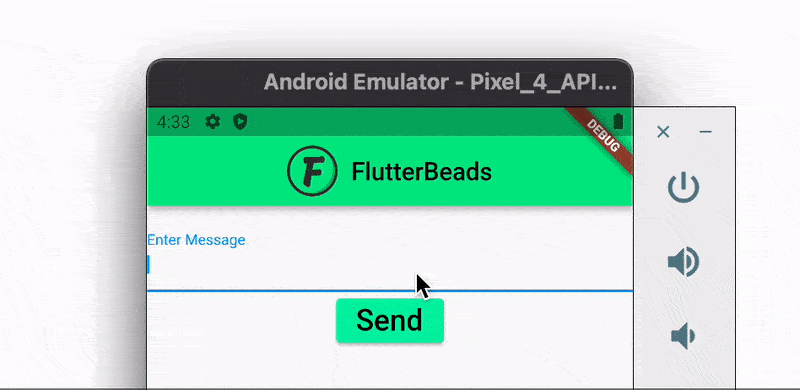
The maxLines and minLines properties can be used to make the TextField multiline. Initially, TextField height is displayed as per the specified minLines, and then the height increases till it reaches the line specified in the maxLines property and then provides the scrollbar after a message goes beyond maxLines.
Steps
Step 1: Inside the TextField, add the minLines parameter and set it to 1.
Step 2: Add one more parameter as maxLines and set it to 5. This will make sure that the TextField shows a full message till it reaches the 5th line.
Step 3: Run the app.
Code Example
TextField(
  decoration: InputDecoration(labelText: 'Enter Message'),
  keyboardType: TextInputType.multiline,
  minLines: 1, // <-- SEE HERE
  maxLines: 5, // <-- SEE HERE
)
Output
Looking to create a polished, professional-looking form in your Flutter app? Don’t miss our guide on setting the height of your text fields! By customizing the height of your text fields, you’ll be able to create a form that is both user-friendly and aesthetically pleasing.
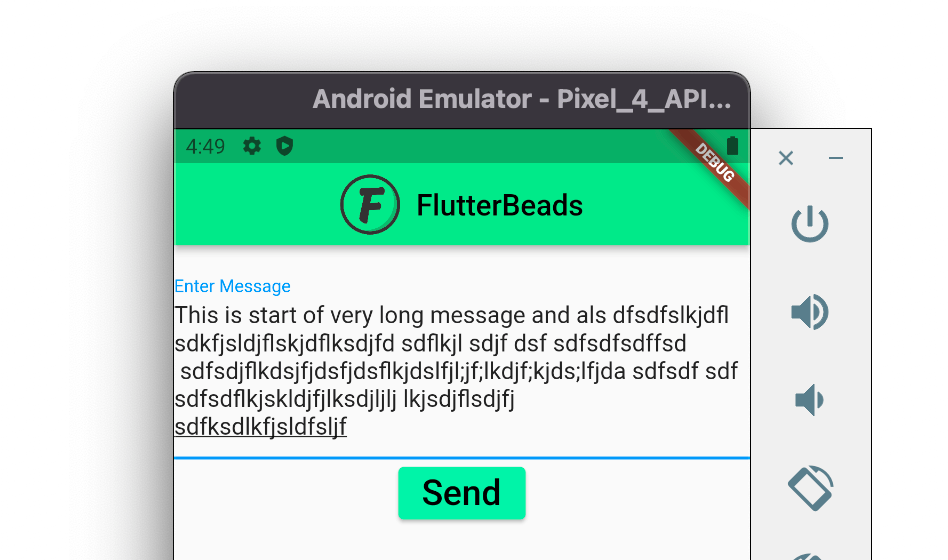
Using Only maxLines Property
Sometimes you may want to allow TextField height to grow as long as its parent allows. You can do so by using the maxLines property.
Steps
Step 1: Inside the TextField, add the maxLines parameter and set it to null.
Step 2: Run the app.
Code Example
TextField(
  decoration: InputDecoration(labelText: 'Enter Message'),
  keyboardType: TextInputType.multiline,
  maxLines: null, // <-- SEE HERE
)
Output
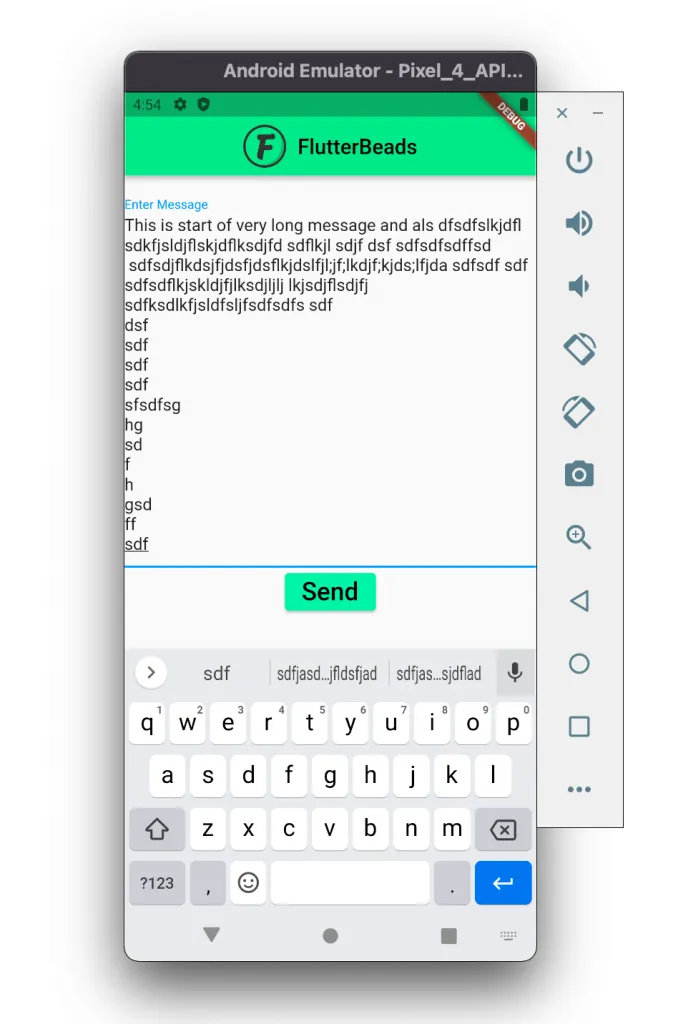
Using expands Property
It is also possible that you may need to wrap your TextField widget inside the Expanded widget. But when you do so, you’ll notice that the TextField underline still shows under the 1st line. To show the underline on the last line, use the expands property.
Steps
Step 1: Inside the TextField, add the maxLines parameter and set it to null.
Step 2: Add the expands property and set it to true.
Step 3: Run the app.
Code Example
Container(
  height: 300,
  child: Column(
    children: [
      SizedBox(
        height: 10,
      ),
      Expanded(
        child: TextField(
          decoration: InputDecoration(labelText: 'Enter Message'),
          keyboardType: TextInputType.multiline,
          maxLines: null,
          expands: true, // <-- SEE HERE
        ),
      ),
      ElevatedButton(
        onPressed: () {},
        child: const Text(
          'Send',
          style: TextStyle(fontSize: 24),
        ),
      ),
    ],
  ),
)
Output

Conclusion
In this tutorial, we learned how to create multiline TextField in Flutter using the top 3 ways. we first saw the problem associated with using a single line TextField and then saw all approaches to make TextField multiline. Basically, the Multiline TextField is created using the combination of maxLines, minLines, and expands property.
Would you like to check other interesting Flutter tutorials?