Buttons are an important UI element for any app. It allows users to perform some actions when tapped. For example, making the API call, navigating to another page, or simply saving the form. But sometimes, you may need to disable Button for some reason in Flutter. So in this tutorial, we’ll learn the simplest way to Disable Button in Flutter.

Here’s what we’ll cover:
Need to Disable Button
Suppose you have a form that sends data to your backend. When users tap the submit button and you don’t do anything such as clearing the Textfields, showing loading icon and you have the Submit button still enabled, there is a high chance that the user will click on the Submit button again. Therefore you should block the user as long as the action is still being processed. Disabling a Button while the action is being performed is a part of blocking the user.
How to Disable Button in Flutter
To disable button in Flutter, just assign the null value to the onPressed parameter of the Button.
Here’s how to disable the ElevatedButton in Flutter:
Step 1: Add the ElevatedButton to your page.
Step 2: Inside the ElevatedButton, assign the null value to the onPressed parameter.
Step 3: Run the app.
Code Example:
ElevatedButton(
  onPressed: null, //<-- SEE HERE
  child: const Text(
    'Submit',
    style: TextStyle(fontSize: 24),
  ),
),
Output:

Similarly, you can disable the other buttons such as TextButton, OutlinedButton, FloatingActionButton, IconButton, etc.
Code Example:
Column(
  children: [
    TextField(
      controller: myController,
      decoration: InputDecoration(labelText: 'Enter Name'),
    ),
    const ElevatedButton(
      onPressed: null,
      child: Text(
        'Submit',
        style: TextStyle(fontSize: 24),
      ),
    ),
    const TextButton(
      onPressed: null,
      child: Text(
        'Submit',
        style: TextStyle(fontSize: 24),
      ),
    ),
    const OutlinedButton(
      onPressed: null,
      child: Text(
        'Submit',
        style: TextStyle(fontSize: 24),
      ),
    ),
    const FloatingActionButton(
      onPressed: null,
      child: Text(
        'OK',
        style: TextStyle(fontSize: 24),
      ),
    ),
    const IconButton(
      onPressed: null,
      icon: Icon(
        Icons.done,
      ),
    )
  ],
)
Output:

If you need to disable a button, we’ve got you covered with this article. But why stop there? Take your UI design to the next level with visually appealing rounded buttons created using Flutter’s Material Design library. Check out the post on “Rounded Button in Flutter” and learn how to make your app stand out.
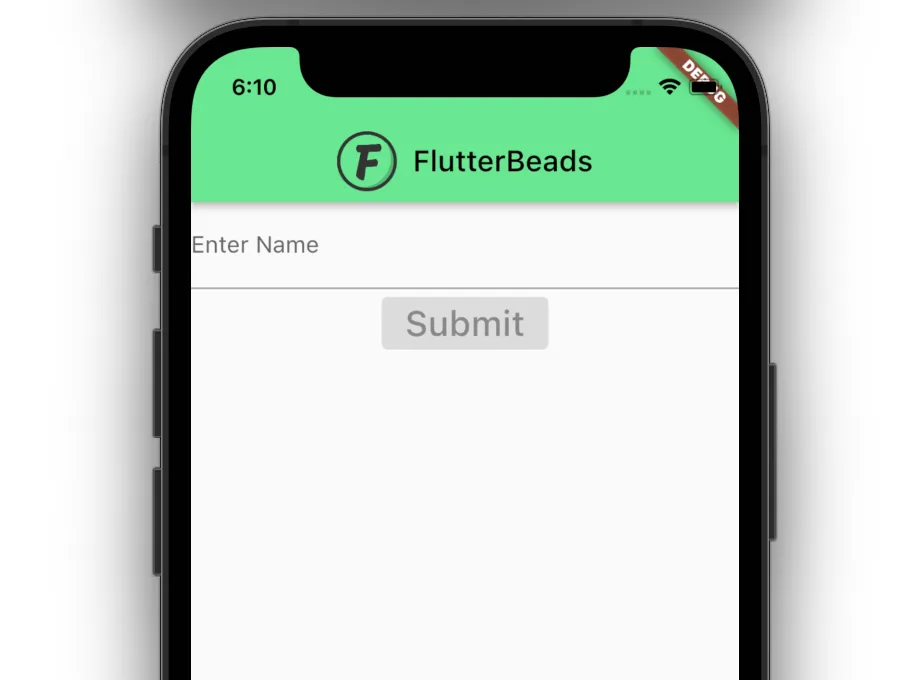
Disable Button if TextField is Empty
Now you know the basics of disabling a button in flutter, let’s try to Enable/Disable the Button programmatically.
Requirement: Disable Buton if the user has not entered or removed the text from the TextField.
Here’s how you do it:
Step 1: Add variable to determine whether to enable/disable button.
bool submit = false;
Step 2: Listen changes on the TextField using the .addListener(). If there is no text in the TextField, update the variable (added previously) and rebuild the widget tree.
final myController = TextEditingController();
//----------
@override
void initState() {
  // TODO: implement initState
  super.initState();
  myController.addListener(() {
    setState(() {
      submit = myController.text.isNotEmpty;
    });
  });
}
//-----------
TextField(
  controller: myController,
  decoration: InputDecoration(labelText: 'Enter Name'),
),
Step 3: Inside the onPressed parameter of a Button, check the variable and accordingly return the null or function (to do something).
ElevatedButton(
  onPressed: submit ? () => submitData : null, //<-- SEE HERE
  child: Text(
    'Submit',
    style: TextStyle(fontSize: 24),
  ),
),
Full Code Example:
import 'package:flutter/foundation.dart';
import 'package:flutter/material.dart';
class DisableButtonDemo extends StatefulWidget {
  const DisableButtonDemo({Key? key}) : super(key: key);
  @override
  State<DisableButtonDemo> createState() => _DisableButtonDemoState();
}
class _DisableButtonDemoState extends State<DisableButtonDemo> {
  final myController = TextEditingController();
  bool submit = false;
  @override
  void initState() {
    // TODO: implement initState
    super.initState();
    myController.addListener(() {
      setState(() {
        submit = myController.text.isNotEmpty;
      });
    });
  }
  @override
  void dispose() {
    // Clean up the controller when the widget is disposed.
    myController.dispose();
    super.dispose();
  }
  @override
  Widget build(BuildContext context) {
    return GestureDetector(
      onTap: () {
        FocusManager.instance.primaryFocus?.unfocus();
      },
      child: Scaffold(
        appBar: ...,
        body: Column(
          children: [
            TextField(
              controller: myController,
              decoration: InputDecoration(labelText: 'Enter Name'),
            ),
            ElevatedButton(
              onPressed: submit ? () => submitData : null,
              child: Text(
                'Submit',
                style: TextStyle(fontSize: 24),
              ),
            ),
          ],
        ),
      ),
    );
  }
}
submitData() {
  // Do something here
}
Output:

Conclusion
In this tutorial, we learned the simplest way to disable button in Flutter with practical examples. Using the same technique we can also disable other types of buttons in Flutter. We also saw how to disable the button when Textfield is empty. Hope you enjoyed it.
Would you like to check other interesting Flutter tutorials?

