
TextField is a widely used widget in Flutter. You may use it to create a simple form or just use it to allow users to enter a message in a chat app. It serves as the primary widget to get the user’s input. Sometimes you may need to change its height and width to match your design and provide a good user experience. So in this tutorial, we’ll learn how to set Flutter TextField height and width.
Here’s what we’ll try to achieve:

Here’s what we’ll cover:
The Problem
When you add the TextField to your page, the default height is set to allow only one line of text, and width is set as long as its parent allows. That means if you wrap the TextField inside the Column widget, TextField’s width is set to full width horizontally and height is set based on the font size (till one line). If the text entered is long enough, the width and height remain the same and TextField starts showing the new characters at the end of the TextField.
TextField Code:
TextField(
  decoration: InputDecoration(
    labelText: 'Enter Name',
    border: OutlineInputBorder(),
  ),
),
Output:

Changing TextField Height
TextField’s height can be changed in 3 ways that are based on your requirement. You can use the Font Size and Content Padding to increase the height and allow a single-line text or use the MaxLines-MinLines property to increase the overall height of the TextField as new text is entered.
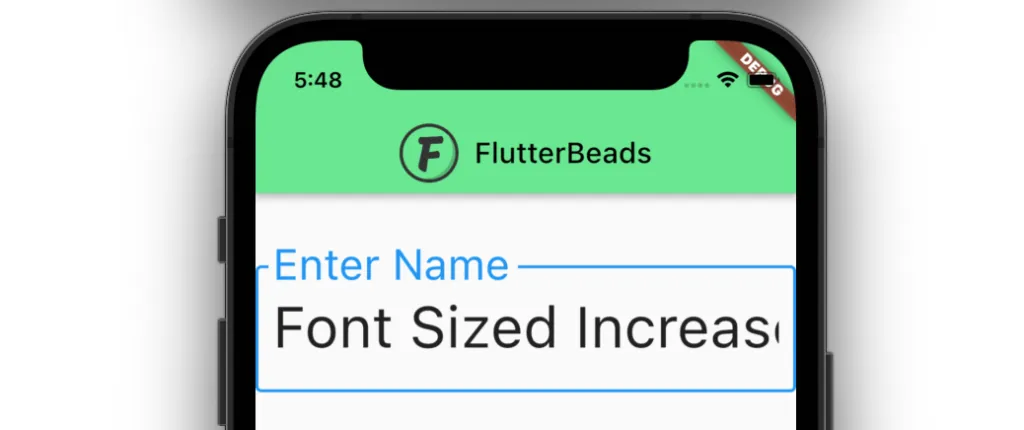
Changing Font Size
If you want to allow only single-line text and change the TextField height, then simply changing the Font Size can help you.
To change the Flutter TextField height by changing the Font Size:
- Inside the TextField, Add the style parameter and assign the TextStyle().
- Inside the TextStyle(), Add the fontSize parameter and set the appropriate value.
- Run the app.
Code Example:
TextField(
  decoration: InputDecoration(
    labelText: 'Enter Name',
    border: OutlineInputBorder(),
  ),
  style: TextStyle(fontSize: 40), // <-- SEE HERE
)
Output:
Looking for ways to customize your Flutter TextField beyond height and width? Check out our blog post on how to set initial values for your TextField for an even more personalized user experience!
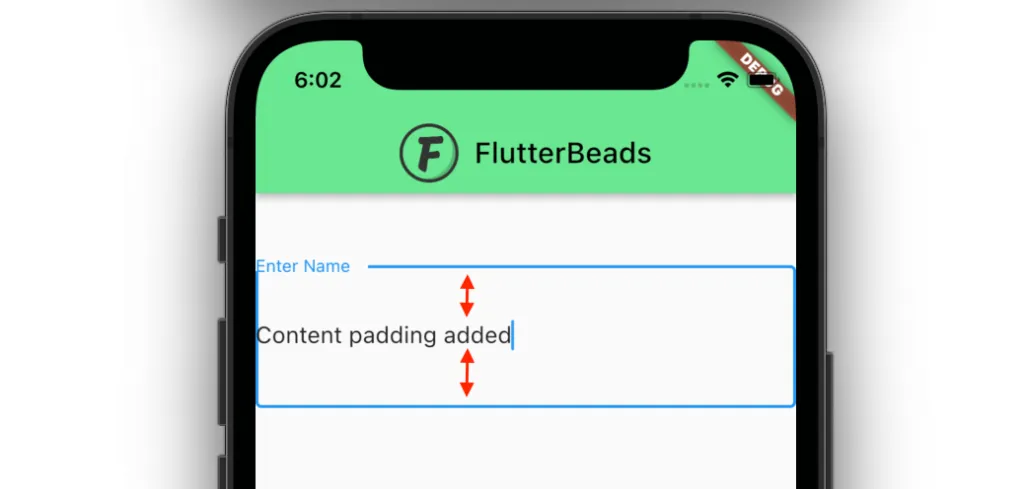
Adding Content Padding
If you notice carefully in the above solution you will find that the size of the placeholder text also changed. i.e Enter Name. If you want to increase the height without changing the font size you can opt for adding Content Padding.
To change the Flutter TextField height by changing the Content Padding:
- Inside the TextField, Add the decoration parameter and assign the InputDecoration().
- Inside the InputDecoration(), Add the contentPadding parameter and assign the EdgeInsets.symmetric(vertical: 40).
- Run the app.
Code Example:
TextField(
  decoration: InputDecoration(
    labelText: 'Enter Name',
    border: OutlineInputBorder(),
    contentPadding: EdgeInsets.symmetric(vertical: 40), // <-- SEE HERE
  ),
)
Output:
Looking for more ways to customize your text input fields in Flutter? Check out our latest blog post on “Customize TextField/TextFormField Border” and learn how to create visually appealing and unique text input fields for your mobile app.
Adding MaxLines and MinLines
If you want to increase the height of the TextField when the long text is entered, you can use the MaxLines and MinLines property.
Note: Setting the MinLines to 1 will show the TextField as regular and setting the MaxLines to 5 will increase the height till the fifth line of the TextField and setting it to null, will make the height grow infinitely.
To change the Flutter TextField height by adding the MaxLines and MinLines:
- Inside the TextField, Add the maxLines parameter and assign the value as 5.
- Inside the TextField, Add the minLines parameter and assign the value as 1.
- Run the app.
Code Example:
TextField(
  decoration: InputDecoration(
    labelText: 'Enter Name',
    border: OutlineInputBorder(),
  ),
  maxLines: 5, // <-- SEE HERE
  minLines: 1, // <-- SEE HERE
)
Output:

Changing TextField Width
To change the TextField width, you can simply wrap your TextField inside the SizedBox widget and give the appropriate width value.
To change the Flutter TextField width:
- Wrap your TextField inside the SizedBox widget.
- Inside the SizedBox, Add the width parameter and assign the appropriate value.
- Run the app.
Code Example:
SizedBox( // <-- SEE HERE
  width: 200,
  child: TextField(
    decoration: InputDecoration(
      labelText: 'Enter Name',
      border: OutlineInputBorder(),
    ),
  ),
),
Output:

Conclusion
In this tutorial, we learned how to set Flutter TextField height and width. To change the height of the TextField we saw different approaches such as changing font size, adding content padding, and adding the maxLines and minLines property while keeping the same font size.
FAQs
How to increase height of textformfield in flutter?
To increase the height of a TextFormField widget in Flutter, you can wrap it inside a SizedBox widget and set the desired height. Here’s an example:
SizedBox(
  height: 60, // set desired height here
  child: TextFormField(
    decoration: InputDecoration(
      labelText: 'Enter your name',
      border: OutlineInputBorder(),
    ),
  ),
),
How to reduce size of textformfield in flutter?
To reduce the size of a TextFormField in Flutter, you can set the contentPadding property to a smaller value, or set the decoration property with a Border that has a smaller thickness. You can also set the fontSize property to a smaller value. Here’s an example code snippet that demonstrates these options:
TextFormField(
  style: TextStyle(fontSize: 12), // Set font size to 12
  decoration: InputDecoration(
    border: OutlineInputBorder(
      borderSide: BorderSide(width: 0.5), // Set border thickness to 0.5
    ),
    contentPadding: EdgeInsets.symmetric(vertical: 8, horizontal: 12), // Set content padding to 8 vertical, 12 horizontal
  ),
),
Would you like to check other interesting Flutter tutorials?
