
The Image widget in Flutter is one of the most used widgets. It is used to display the pictorial representation of any information or object. But after adding the default Image, sometimes you might need to add or customize the border of the Image. So in this tutorial, we will see how to add and customize the Image border in Flutter.
Here are different versions of the image border:

Here’s what we’ll cover:
- How to add border to image in Flutter
- How to add border radius or rounded border to the image
- Add or Change image border color
- Creating a circular image with a rounded border
Before we proceed further, here’s is the official video on how to use the Image widget:
How to add border to image in Flutter
To add border to image in Flutter, first, wrap the Image widget inside the Container widget. Inside the Container, add the decoration property and assign the BoxDecoration widget. Using the border property of BoxDecoration, you can provide the Border.all() widget to create border around the image.
Here is a step by step instructions the for adding border to image in Flutter:
- Locate the file where you have placed the
Image.assetorImage.networkwidget. - Wrap the
Imagewidget inside theContainerwidget. - Inside the
Containerwidget, add thedecorationproperty and assign theBoxDecorationwidget. - Inside the
BoxDecoration, add theborderproperty and assign theBorder.allwidget. - Inside the
Border.all, add thewidthproperty to specify the thickness of the border.
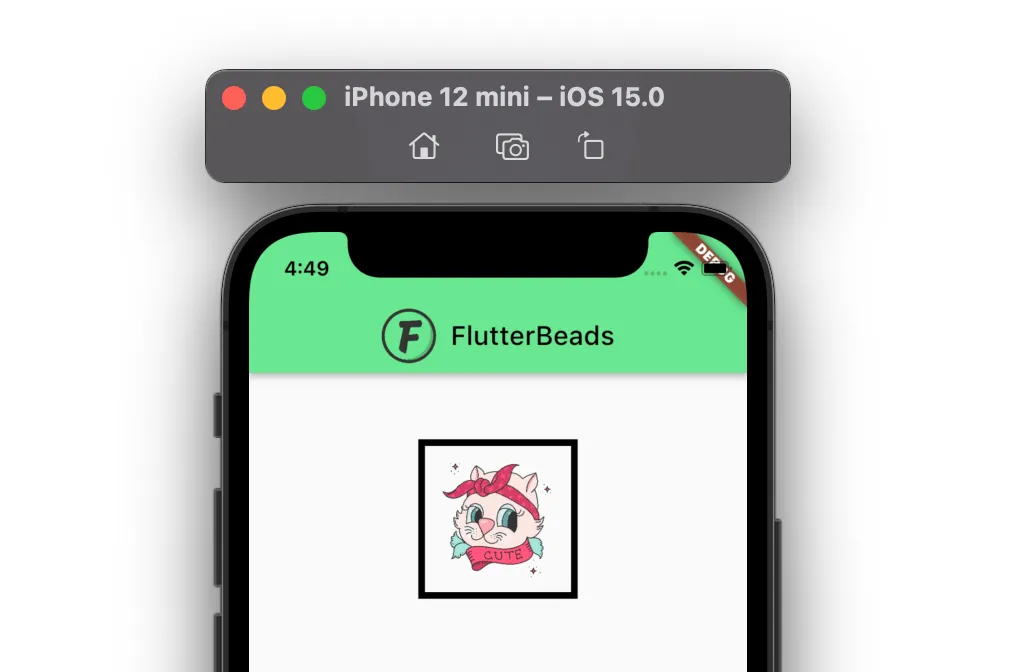
Code Example
Container(
  height: 120,
  width: 120,
  decoration: BoxDecoration(
    border: Border.all( //<-- SEE HERE
      width: 5,
    ),
  ),
  child: Image.asset('assets/images/cat3.png'),
)
Output
How to add border radius or rounded border to the image
To add a border radius or create a rounded border around the image, you can wrap the image widget inside the Container widget. Inside the Container, add the decoration parameter and then the BoxDecoration. You can use the BoxDecoration to set the border to Border.all(width: 5) and and borderRadius to BorderRadius.circular(20).
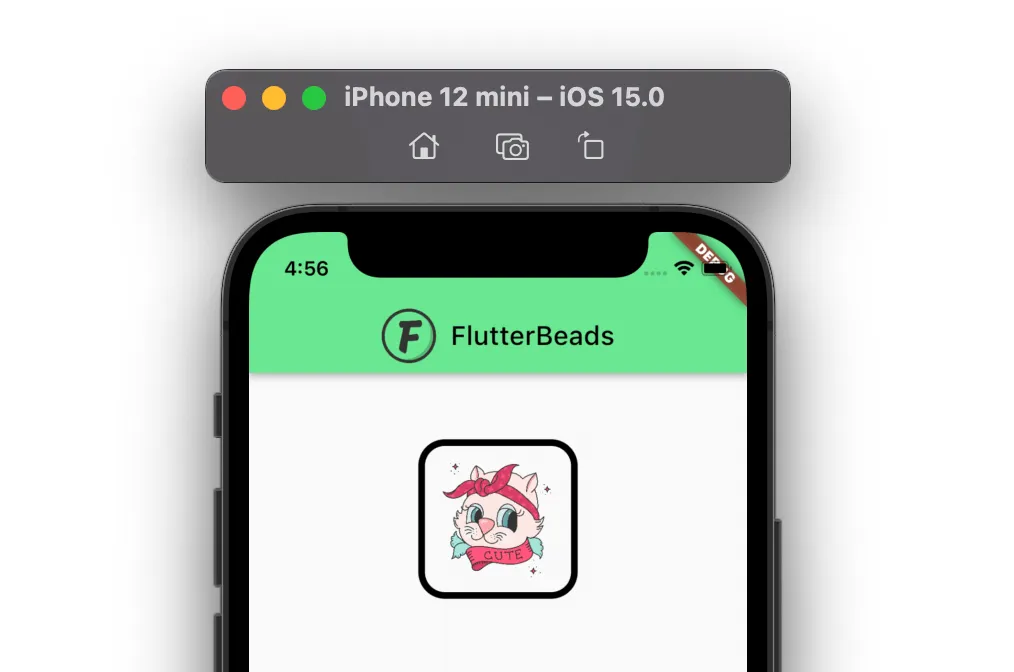
Code Example
Container(
  height: 120,
  width: 120,
  decoration: BoxDecoration(
    border: Border.all(width: 5),
    borderRadius: BorderRadius.circular(20), //<-- SEE HERE
  ),
  child: Image.asset('assets/images/cat3.png'),
),
Output
Add or Change image border color
To add or change the image border color, first, create the border around the image as usual, and then add the color parameter inside the Border.all() constructor and set the color of your choice.
Code Example
Container(
  height: 120,
  width: 120,
  decoration: BoxDecoration(
    border: Border.all(width: 5, color: Colors.greenAccent), //<-- SEE HERE
  ),
  child: Image.asset('assets/images/cat3.png'),
)
Output

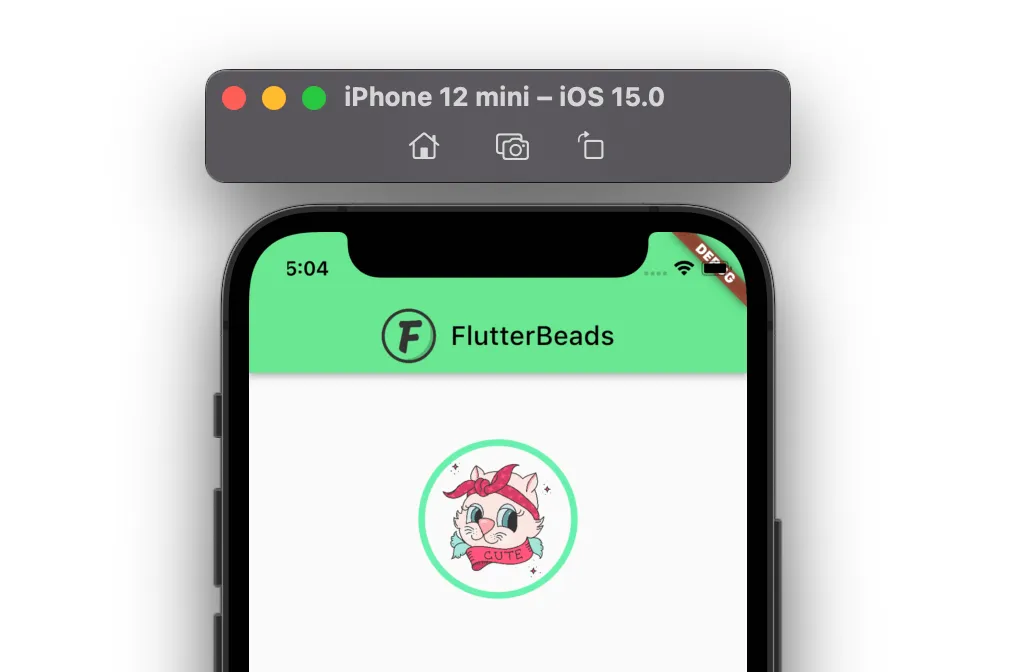
Creating a circular image with a rounded border
To create a circular image with rounded border, first, create the border around the image as usual. Using the border property of BoxDecoration you can provide the Border.all() widget to create border and then make it rounded by setting the borderRadius to BorderRadius.circular(100).
Note: The BorderRadius.circular(100) value should be equal or more than the half size of the image. For example if the image’s heigth width is 200 then the BorderRadius.circular must have value 100 or above. This will make the circular border.
To learn the best way to create the Circular Image, check out this page.
Code Example
Container(
  height: 120,
  width: 120,
  decoration: BoxDecoration(
    border: Border.all(width: 5, color: Colors.greenAccent),
    borderRadius: BorderRadius.circular(100), //<-- SEE HERE
  ),
  child: Image.asset('assets/images/cat3.png'),
)
Output
Conclusion
In this tutorial, we learned how to customize image border in Flutter with practical examples, we first saw how to add a border, add border-radius, change the border color, and later explored how to create a circular border around the image.
Would you like to check other interesting Flutter tutorials?
